Wednesday, February 29, 2012

Aggregate Persistence Wizard

Aggregate tables store precomputed results, which are measures that have been aggregated (typically summed) over a set of dimensional attributes. Using aggregate tables is a very popular technique for speeding up query response times in decision support systems. This eliminates the need for run-time calculations and delivers faster results to users. The calculations are done ahead of time and the results are stored in tables. Aggregate tables should have fewer rows than the nonaggregate tables and, therefore, processing should be quicker.
The aggregate navigation capability of Oracle BI Server allows queries to use the information stored in aggregate tables automatically, without query authors or tools having to specify aggregate tables in the queries. Oracle BI Server allows users to concentrate on asking the right business questions, because the server decides which tables provide the fastest answers. For Oracle BI Server to have enough information to navigate to aggregate tables, certain metadata in the repository must be correctly configured.
The traditional process of creating aggregates for Oracle BI Server queries is manual. It can be tedious, requiring complicated data definition language (DDL) and data manipulation language (DML) scripts to be written for creating tables in the databases involved. Additionally, these aggregated tables need to be mapped to the repository metadata to be available for queries. This is a time-consuming and, possibly, error-prone process.
The Aggregate Persistence Wizard enables you to automate the creation of physical aggregate tables and their corresponding objects in the repository. The Aggregate Persistence Wizard creates an Oracle BI Enterprise Edition SQL script, which is executed by the BI Server. The script specifies each aggregate table to be created, the facts from the business model that should be included in it, and its dimensions and grain. When the BI Server runs the aggregate persistence SQL script, it generates DDL to create the required tables in the target database, internal instructions to generate the corresponding physical and aggregate navigation metadata, and data manipulation language (DML) to aggregate and load data from the base tables into the aggregate tables. The aggregate persistence script is intended to be run after each extraction, transformation, and loading (ETL) of the base tables, typically nightly. This can be done by an Oracle BI EE Job Manager job, or it can be run as a .bat or any other script called by a custom program.

You can find step by step instructions to create aggregate tables using Aggregate Persistence Wizard on Oracle's site(Oracle By Examples) - http://www.oracle.com/webfolder/technetwork/tutorials/obe/fmw/bi/biee/r1013/aggpersist/aggpersist.htm .

Thursday, February 23, 2012

Kill An Active Query in OBIEE

An OBI Server Administrator can kill any active query. When OBI Server Administrator kills an active query, the execution of that query will be terminated.

Steps to Kill an Active Query :
1. In the Administration Tool, open a repository in online mode and choose Manage > Sessions.

2. Select the user session that initiated the query in the top window of the Session Manager. After the     user is highlighted, any active query requests from that user are displayed in the bottom window.

3. Select the request you want to kill.

 4. Click Kill Request to terminate the highlighted request.
The user receives a message indicating that the query was terminated by the Oracle BI Administrator. The query is immediately terminated, and any outstanding queries to underlying databases are canceled.
 Repeat this process to kill any other requests.


5. To close Session Manager, click close.

Wednesday, February 22, 2012

Server Session Management in OBIEE


The Session Manager is used in online mode to monitor activity. The Session Manager shows all users logged into the session, all current query requests for each user, and variables and their values for a selected session. Additionally, the Oracle BI Administrator can disconnect any users and kill any query requests with the Session Manager.

 To open session manager go to Administrator Tool -> Manage -> Session.

The Session Manager contains an upper and a lower pane :

1. The top window, the Session window, shows users currently logged into the Oracle BI Server. To  control the update speed, from the Update Speed drop-down list, choose Normal, High, or Low. Select Pause to keep the display from being refreshed. 


In my case, two users were logged in, so Session window showing two users with different Session IDs.

2. The bottom window contains two tabs. 
  -> The Request tab shows active query requests for the user selected in the Session window. 


    -> The Variables tab shows variables and their values for a selected session.


The Oracle BI Administrator can disconnect any users and kill any query requests with the Session Manager.
Find more info about Kill Activwe Query  on http://jaga-obiee.blogspot.in/2012/02/obiee-kill-active-query.html

Fields in the Session Window
Column Name
Description
Client Type
The type of client connected to the server.
Last Active Time
The timestamp of the last activity on the session.
Logon Time
The timestamp that shows when the session initially connected to the Oracle BI Server.
Repository
The logical name of the repository to which the session is connected.
Session ID
The unique internal identifier that the Oracle BI Server assigns each session when the session is initiated.
User
The name of the user connected.
 Some Fields in the Request Tab
Column Name
Description
Last Active Time
The timestamp of the last activity on the query.
Request ID
The unique internal identifier that the Oracle BI Server assigns each query when the query is initiated.
Session ID
The unique internal identifier that the Oracle BI Server assigns each session when the session is initiated.
Start Time
The time of the individual query request. 

Wednesday, February 8, 2012

Error Codes: OPR4ONWY:U9IM8TAC

 The Presentation Services User gets the mentioned error when he issue any request to the OBI server.

Error Codes: OPR4ONWY:U9IM8TAC
State: HY000. Code: 10058. [NQODBC] [SQL_STATE: HY000] [nQSError: 10058] A general error has occurred. [nQSError: 43082] Illegal operation attempted on a closed request. (HY000).


The most possible reason is :

BI Server Administrator might have killed the active query (active query means the query which is being processing by BI Server). So once the admin killed an active query, BI server will stop processing that query and the user will get above mentioned error in Presentation services.


Solution : Resend the same request by clicking on Results tab in Answers.

Disconnect a user from a session

OBI Server Administrator can disconnect any user from their current session.

When Administrator disconnects a user's session, then current session of that user will be ended for the OBI Presentation Services. So the user session receives a message indicating that the session was terminated by the Oracle BI Administrator. Any currently running queries are immediately terminated, and any outstanding queries to underlying databases are canceled.

Follow the below steps to disconnect a user from session. 
1. In the Administration Tool, open the repository in online mode and choose Manage > Sessions. 
2. Select the user in the Session Manager top window.

Note : Session ID  for an Administrator with a red image indicates that it  is a OBI Server Administrator and we can not disconnect that user session.
3. Click Disconnect. 
4. To close Session Manager, click close.

Error Codes: OPR4ONWY:U9IM8TAC:OI2DL65P:OI2DL65P


User gets the below shown error in Presentation Services when he try  to issue any requests to OBI Server.

Error Codes: OPR4ONWY:U9IM8TAC:OI2DL65P:OI2DL65P
State: HY000. Code: 10058. [NQODBC] [SQL_STATE: HY000] [nQSError: 10058] A general error has occurred. [nQSError: 43081] Illegal operation attempted on a closed session. (HY000)


The most possible reason for this error is : 
The BI Server Administrator might have disconnected the current user's session and that user might be still sending request to the BI Server.

Solution :
When the BI Server Administrator disconnects USER from the current session, then such user can not send request to the BI Server. Because that user in no more in the session to request.

Solution : Log out from the Presentation Services (just click on the Log Out button) and again Log in and check the same request.

Tuesday, February 7, 2012

Create your own Date Dimension table

As we all know Date dimension table is very important table for any Business. Here I am trying to show a simple method to create Date dimension.
I used MS SQL Server to create the table.

First create the table in database using the following code.

create table datetimetable(
row_wid int not null,
[date] datetime not null,
[yago_dt] datetime not null,
[mago_dt] datetime not null,
[day] text not null,
[day_num] int not null,
[week] int not null,
[mon] text not null,
[mon_short] text not null,
[mon_num] int not null,
[mon_year] text not null,
[qtr_num] int not null,
[qtr_year] text not null,
[year] int not null,
constraint pk_date primary key clustered (row_wid)
)

Then copy the following code and execute it.

declare @startdate datetime
declare @enddate datetime
set @startdate ='20110101'
set @enddate  = '20151231'
declare @loopdate datetime
set @loopdate  = @startdate
while @loopdate  <= @enddate
begin
insert into datetimetable values (
(year(@loopdate) * 10000) + (month(@loopdate) * 100) + DAY(@loopdate),
@loopdate  ,
dateadd(month,-12,@loopdate),
dateadd(month,-1,@loopdate),
datename(dw,@loopdate),
datepart(dw,@loopdate),
datepart(wk,@loopdate),
datename(month,@loopdate),
left(datename(month,@loopdate),3),
month(@loopdate),
cast(year(@loopdate ) as varchar(4))+ 'M' + cast(month(@loopdate) as varchar(2)),
case when month(@loopdate) in (1,2,3) then 1
when month(@loopdate) in (4,5,6) then 2
when month(@loopdate) in (7,8,9) then 3
when month(@loopdate) in (10,11,12) then 4
end,

case when month(@loopdate) in (1,2,3) then cast(@loopdate as varchar(4))+'Q1'
when month(@loopdate) in (4,5,6) then cast(@loopdate as varchar(4))+'Q2'
when month(@loopdate) in (7,8,9) then cast(@loopdate as varchar(4))+'Q3'
when month(@loopdate) in (10,11,12) then cast(@loopdate as varchar(4))+'Q4'
end,
year(@loopdate)
)
set @loopdate = dateadd(d,1,@loopdate)
end


We have created the table, now bring this table into RPD.


Image Promt In OBIEE

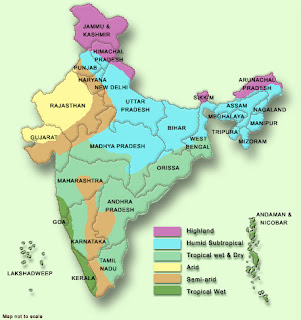
In my case, I am using India map, when a user clicks on any state it will show population for that state by district wise.

I have used the following image named india_map.jpg


1. Create a folder "images" in the following location and copy the above image in "images"    folder.
D:\OracleBI\oc4j_bi\j2ee\home\applications\analytics\analytics

2. Then Restart the OC4J.

3. Check whether you are able to access the image using the following URL.
http://localhost:9704/analytics/images/india_map.jpg 

In browser, if u get the image, then no issues with the image path. When you are not able to see the image, then there might be problem with the image path. Correct it and try again.


4. Consider the following criteria using the MAP table(in my example):


5. To add Image prompt, go to Prompts -> create prompt. Then select Image Prompt.


6. Fill the details as below.


Code  which I have used for image map is  : 
<map id="india" name="india">
<area shape="poly" alt="Karnataka" coords="150,283,148,292,146,296,147,305,143,314,140,321,140,324,135,335,140,343,145,343,145,345,140,347,141,350,141,351,152,350,159,354,160,360,150,365,149,374,145,380,140,380,138,382,130,386,105,365,107,341,104,329,102,324,99,323,103,314,100,309,105,305,110,301,118,303,121,297,131,295,143,282" href="http://www.indiaonlinepages.com/population/karnataka-population.html" title="Karnataka" target="_blank" />
<area shape="poly" alt="Chennai" coords="143,380,144,386,148,393,153,401,154,406,159,412,162,417,167,422,169,413,173,408,178,408,182,404,180,397,179,386,188,366,187,353,176,361,170,363,167,361,165,365,162,367,151,368" href="http://www.census.tn.nic.in/" title="Chennai" target="_blank" />
<area shape="poly" alt="Goa" coords="91,320,100,323,102,328,100,330,99,332,96,332,93,330" href="http://www.citypopulation.de/India-Goa.html" title="Goa" />
<area shape="poly" alt="Kerala" coords="134,431,140,425,142,417,141,409,136,400,130,394,130,384,106,367,120,395,127,416" href="http://www.prokerala.com/kerala/population.htm" title="Kerala" target="_blank" />
<area shape="poly" alt="AP" coords="158,352,160,346,165,343,166,333,169,325,169,318,169,311,165,309,159,310,153,312,145,312,150,282,154,276,153,270,159,270,162,260,164,262,169,265,176,265,181,264,184,275,190,281,196,286,195,288,202,293,210,289,214,289,218,287,216,283,223,281,229,275,232,273,238,272,241,273,245,275,248,275,251,276,250,278,244,286,238,291,231,293,223,299,217,301,219,307,213,315,207,315,205,315,201,323,192,322,191,322,186,330,187,342,187,350,182,356,172,362,168,361,165,367,155,368,152,367,153,363,160,360" href="http://indiafacts.in/uncategorized/andhra-pradesh-districts-population-census-2011/" title="AP" />
<area shape="rect" alt = "india" coords = "0,0,443,473" href="http://updateox.com/india/district-wise-population-india-as-of-2011-census/" alt="" />
</map>


Then click on Extract Image Map from HTML.

7. Then fill the column name and value for the corresponding image area.


8.  Click OK, Test Prompts and save it.


Saturday, February 4, 2012

To Restrict access to database during particular time period

We can restrict access to any database during particular time period  for any user.
Open the Administrator Tool, Go to Manage -> security.
In Security Manager, click on Users in left pane, then  on right pane select the user and open properties(right click on user and select properties).
Then click on Permission Tab.


In the User/Group Permissions dialog box, click the Query Limits tab and expand the dialog box to view all columns then to restrict access to a database during particular time periods, in the Restrict column, click the ellipsis button.


In the Restrictions dialog box, perform the following steps: 
1. To select a time period, click the stat time and drag t end time.
2. To expilicitly allo access, click Allow.
3. To explicitly disallow access, click Disallow.

In my case, I selected paint database(clicked on the ellipsis located beside to paint ) and restrict access to that database from 6am to noon on every Monday for that user.


Then click OK. Restart the OBI server services and check it presentation services by login  as that user.

Save Column Properties


Save the Column Properties as "System wide deault for a column" or "System wide deault for data type".

When you build a request, you can edit properties for a column to control the appearance and layout
of a column and its contents. By default, your selections for a column apply only to the current
request.
If your user ID has the appropriate permissions, you can save your selections as the system-wide
default settings to use every time that data from the column, or columns of this particular data type,
appear in results.

Step1: Login to Presentation services as Administrator(By default Administrator has this permission).


Step2: Select any column from any table.


Step3: Click on column properties button of the column. Then you will get the column properties  window. Here you select all the properties.

Step4: Now click on the save button.


Now we can save the formatting properties as  the system-wide
default settings to use every time that data from the column, or columns of this particular data type,
appear in results.


Oracle BI Administrator Account

The Oracle BI Administrator account (user ID of Administrator) is a default user account in every Oracle BI repository. This is a permanent account. It cannot be deleted or modified other than to change the password and logging level. It is designed to perform all administrative tasks in a repository, such as importing physical schemas, creating business models, and creating users and groups.

NOTE:  The Oracle BI Administrator account is not the same as the Windows NT and Windows 2000 Administrator account. The administrative privileges granted to this account function only within the Oracle BI Server environment.

When you create a new repository, the Oracle BI Administrator account is created automatically and has no password assigned to it. You should assign a password for the Oracle BI Administrator account as soon as you create the repository.  

Any query issued from the Oracle BI Administrator account has complete access to the data; no restrictions apply to any objects.

Wednesday, February 1, 2012

User Name and Group Name cant be same for OBI Presentation Catalog

This is a small tip for Presentation Services Administrator.
While creating user group, I gave group name same as the user name, I received an error like 'Error Mapping Groups '. After that I gone through some blogs and got to know that "USER NAME AND GROUP NAME CAN NOT BE SAME".


So, while creating groups for Presentation Service Catalog, make sure that username and groupname must not be same.